Environment plays a vital role in the application development. As per the requirements, we have to create few environments, viz. Dev, QA, UAT, and Prod. In some projects, only a subset of these environments is required. So, with different environments comes different API endpoints. But for Android application development, most of the developers are still following the same old concept of enabling the endpoint of one environment and commenting endpoints of the rest of the environments. Now, we have Product Flavors in Android. And, it maintains the build as per the requirement. That is, there is no need to change in code if a build for a different environment is required.
Solution to problems using Product Flavors in Android
Developers have to change settings and need to tweak some code based on environment. So, here is a list of few problems that could be solved using Product Flavors in Android.
– Change API endpoints while creating build
– At a time have all environment APK in the same device
– Enable/Disable Logs based on environment
– Different icons and other resources for each environment, without increasing APK size
– Add versionNameSuffix to different productFlavors
Before providing solution to above-mentioned problems, we need to configure Product Flavors in Android Application Project
Configure Product Flavors in Android Application Project
To configure Product Flavors, we need to modify the app/build.gradle file.
android {
    ...
    productFlavors {
        prod {
        }
        uat {
        }
        dev {
        }
    }
}
After this modification, Android Studio will ask to sync the project. After syncronization is completed, following build variants will be avaiable.

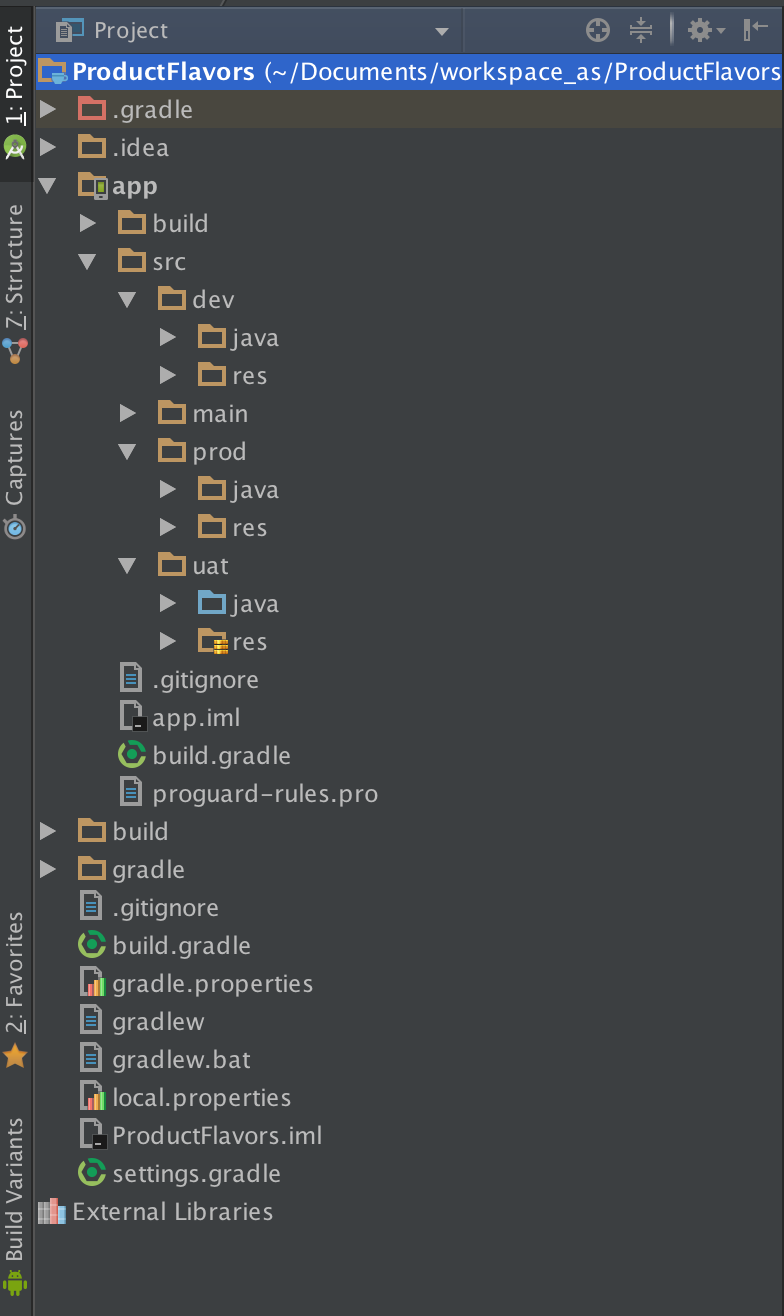
Directory structure changes (addition)
With this change, now we have 3 productFlavors, viz. prod, uat and dev. Now we have to create directories for them to have settings based on environments.
<productFlavor>
|
|-java
| |
| `-<package>
|   |
|   `-<java-classes>
`-res
  |
  |-drawable
  |-mipmap
  |-layout
  `-values
So, the application will have directory structure based on above mentioned blue-print. It is not necessary to create all sub-directories. If the requirement is of changing launcher icons only, then create only drawable variants inside res directory.
The directory structure of our demo application will be like:

Gradle Build Tasks changes with productFlavors
By default, we have assembleDebug and assembleRelease gradle build tasks available. But, after providing productFlavors, we get additional gradle tasks along with these tasks.
For instance, with our dev, uat and prod productFlavors, we will get following gradle tasks.
– assembleDevDebug
– assembleDevRelease
– assembleUatDebug
– assembleUatRelease
– assembleProdDebug
– assembleProdRelease
There will be more than these gradle tasks available. Running these tasks will generate APK of that flavor. If we run assembleDebug or assembleRelease, then all the flavors will be build in alphabetical order. For assembleDebug, debug APK of all flavors will be created inside app/build/outputs/apk directory.
The builds created with flavor, will be named in following format:app-<productFlavor>-<debug/release>.apk
For above mentioned tasks, APK will be created with following name:app-dev-debug.apkapp-dev-release.apkapp-uat-debug.apkapp-uat-release.apkapp-prod-debug.apkapp-prod-release.apk
Solve Problems by Product Flavors
Let us solve above-mentioned problems with the help of Product Flavors in Android.
Change API endpoints while creating build
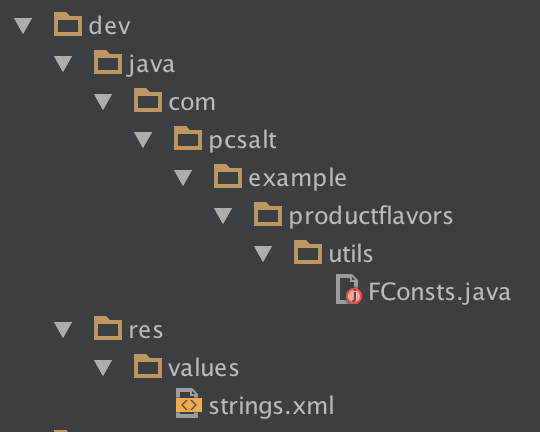
To change API endpoints at the time of build creation, create a class FConsts in all the flavors. And, provide a constant API_ENDPOINT with value specific to the productFlavor.
package com.pcsalt.example.productflavors.utils;
public final class FConsts {
    public static final String API_ENDPOINT="http://dev.api-server.com";
    private FConsts() {
    }
}
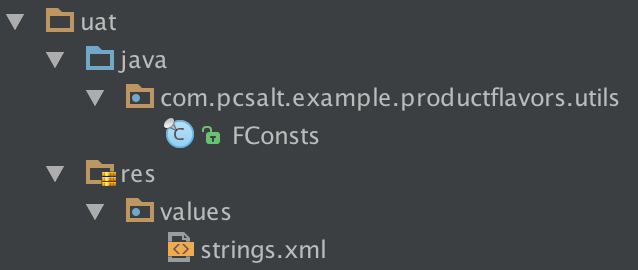
package com.pcsalt.example.productflavors.utils;
public final class FConsts {
    public static final String API_ENDPOINT="http://uat.api-server.com";
    private FConsts() {
    }
}
package com.pcsalt.example.productflavors.utils;
public final class FConsts {
    public static final String API_ENDPOINT="http://api-server.com";
    private FConsts() {
    }
}
Now, if you select the appropriate Build Variant and build the application. The created build will point to the environment specific API endpoint. So, no code change for changing API endpoints anymore.
NOTE:
(1) The class name must be same in all the productFlavors,
(2) The class must be available in all the productFlavors, otherwise, it will throw ClassNotFoundException,
(3) The class(s) created inside productFlavors and inside main directory cannot have same name (package name + class name),
(4) Resources files like drawables, layouts and values can have same name and the ids of values. During build creation, the resources are merged and preference is given to those available in productFlavor directory over those in main directory.
Another method to achive this is by providing the values in productFlavors block in app/build.gradle file.
android {
    ...
    productFlavors {
        prod {
            buildConfigField 'String', 'API_ENDPOINT', '"http://api-server.com"'
        }
        uat {
            buildConfigField 'String', 'API_ENDPOINT', '"http://uat.api-server.com"'
        }
        dev {
            buildConfigField 'String', 'API_ENDPOINT', '"http://dev.api-server.com"'
        }
    }
}
By doing this, API_ENDPOINT could be accessed in the application with BuildConfig.API_ENDPOINT.
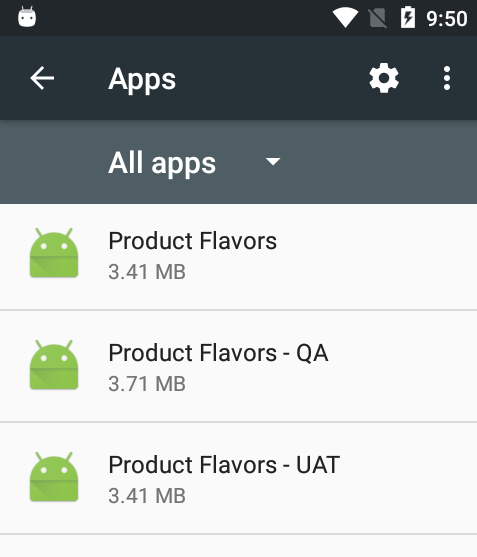
At a time have all environment APK in the same device
Android allows installation or update of any application based on the applicationId of any application. So, to install build of all environment in the same device at a time, we need to provide different applicationId to all the flavors.
android {
    ...
    productFlavors {
        prod {
            applicationId "com.pcsalt.example.productflavors"
        }
        uat {
            applicationId "com.pcsalt.example.productflavors.uat"
        }
        dev {
            applicationId "com.pcsalt.example.productflavors.dev"
        }
    }
}
By doing this, the package name of the application will be different for all the flavors. This will allow the device to have all build installed at once.
If there is any permission or value mentioned in AndroidManifest.xml which uses applicationId. Then, in that case, you could access the applicationId of the flavor using ${applicationId} variable in AndroidManifest.xml.
<permission
    android:name="${applicationId}.permission.C2D_MESSAGE"
    android:protectionLevel="signature"/>
<uses-permission android:name="${applicationId}.permission.C2D_MESSAGE"/>
<receiver
    android:name="com.pcsalt.example.productflavor.receiver.MyGcmBroadcastReceiver"
    android:permission="com.google.android.c2dm.permission.SEND">
    <intent-filter>
        <action android:name="com.google.android.c2dm.intent.RECEIVE"/>
        <category android:name="${applicationId}"/>
    </intent-filter>
</receiver>
NOTE: If you update the applicationId of your application, you may need to update the settings of any 3rd party library (like few Google services) which uses applicationId to provide API key.
Enable/Disable Logs based on environment
Same as different API_ENDPOINT for differnt flavors, we will create a constant in FConsts class and use it before displaying any log.
package com.pcsalt.example.productflavors.utils;
public final class FConsts {
    public static final boolean ENABLE_LOG=true;
    private FConsts() {
    }
}
package com.pcsalt.example.productflavors.utils;
public final class FConsts {
    public static final boolean ENABLE_LOG=true;
    private FConsts() {
    }
}
package com.pcsalt.example.productflavors.utils;
public final class FConsts {
    public static final boolean ENABLE_LOG=false;
    private FConsts() {
    }
}
Now, if you select the appropriate Build Variant and build the application. The created build will point to the environment specific API endpoint. So, no code change for changing API endpoints anymore.
Another method to achive this is by providing the values in productFlavors block in app/build.gradle file.
android {
    ...
    productFlavors {
        prod {
            buildConfigField 'boolean', 'ENABLE_LOG', 'false'
        }
        uat {
            buildConfigField 'boolean', 'ENABLE_LOG', 'true'
        }
        dev {
            buildConfigField 'boolean', 'ENABLE_LOG', 'true'
        }
    }
}
By doing this, ENABLE_LOG could be accessed in the application with BuildConfig.ENABLE_LOG.
Different icons and other resources for each environment, without increasing APK size
To provide different icon for each environment, add resources in all flavors with same name. And, in the layout file in main/layout.xml use the name of resource. When the build is created for Dev flavor, the image resource from Dev flavor will be used, same goes with other flavors.
Add versionNameSuffix to different productFlavors
For different buildTypes you can provide different versionNameSuffix. But, when it comes to provide it for productFlavors, there is no direct way of doing so.
For this, you can create few (only two) methods in application level gradle file, i.e. app/build.gradle
This method will return the current selected productFlavors in lower case.
import java.util.regex.Matcher
import java.util.regex.Pattern
def getCurrentFlavor() {
    String taskRequestName = getGradle().getStartParameter().getTaskRequests().toString()
    Pattern pattern;
    if (taskRequestName.contains("assemble"))
        pattern = Pattern.compile("assemble(\\w+)(Release|Debug)")
    else
        pattern = Pattern.compile("generate(\\w+)(Release|Debug)")
    Matcher matcher = pattern.matcher(taskRequestName)
    if (matcher.find()) {
        return matcher.group(1).toLowerCase()
    } else {
        return "";
    }
}
By using the above method, we can compare the flavor and return the correct versionNameSuffix.
def getCurrentVersionSuffix() {
    def currentFlavor = getCurrentFlavor()
    if (currentFlavor.equals("prod")) {
        return "-prod"
    } else if (currentFlavor.equals("uat")) {
        return "-uat"
    } else if (currentFlavor.equals("dev")) {
        return "-dev"
    }
}
Now, call this method from debug or release buildTypes.
buildTypes {
    debug {
        versionNameSuffix getCurrentVersionSuffix()
    }
    release {
        minifyEnabled false
        proguardFiles getDefaultProguardFile('proguard-android.txt'), 'proguard-rules.pro'
        versionNameSuffix getCurrentVersionSuffix()
    }
}
Download Source Code
A demo application is available on GitHub, with similar implementation of productFlavors.