In order to create Android Virtual Device (AVD), you have to open or create an Android application project. After project is initialised and ready to work on, open AVD via any of the available methods.
Steps to create AVD
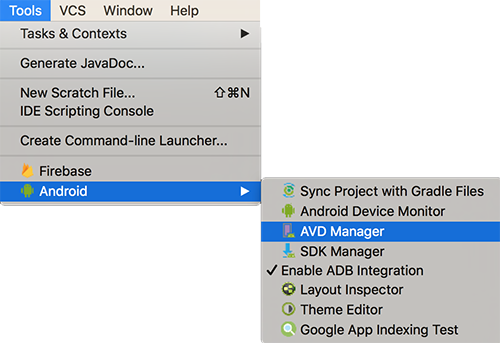
Step 1 Open AVD manager
To open AVD manager, you can follow any of the following steps:
From menu:
From toolbar:

Step 2 Click on Create Virtual Device..

Step 3 In Select Hardware screen, select the type of AVD you need to create. Available options are TV, Wear, Phone and Tablet.

Step 4 After selecting the type of AVD, select an available device from the menu.
Step 5 Once you are sure about the device image type, click next.
Step 6 In System Image screen, select from available image type.
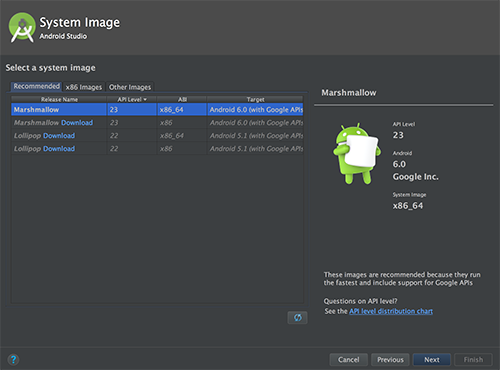
NOTE: This screen lists only those system images whose images and SDK are installed from SDK manager.
Step 7 After selecting the system image, click next.
Step 8 In Android Virtual Device (AVD) screen, you will be asked to personalise the AVD. You can name the AVD and choose the default screen orientation, whenever the AVD is loaded it will load in the selected orientation.
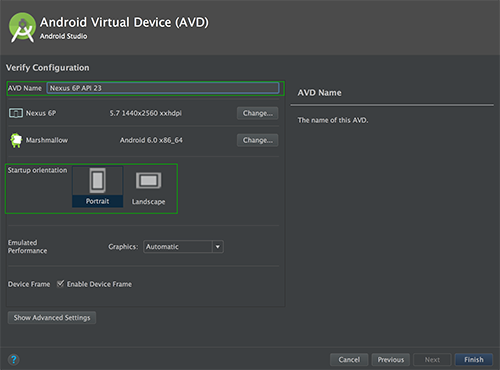
Step 9 After personalising the AVD, click on Finish. It will create an AVD and will be listed in the Available devices, whenever any application is Run/Debug.


